Related Articles

If you have no read my previous post about G Suite vs Webmail, I request you to please read it before continuing. This is going to be more of a Step By Step Guide to setup G Suite. Based on my experience of migrating to G Suite, I’ll mention all the things you need to keep in mind before switching to G Suite. So without wasting any time, here’s How to setup G Suite Mail and Apps.
Register for Google Apps G Suite
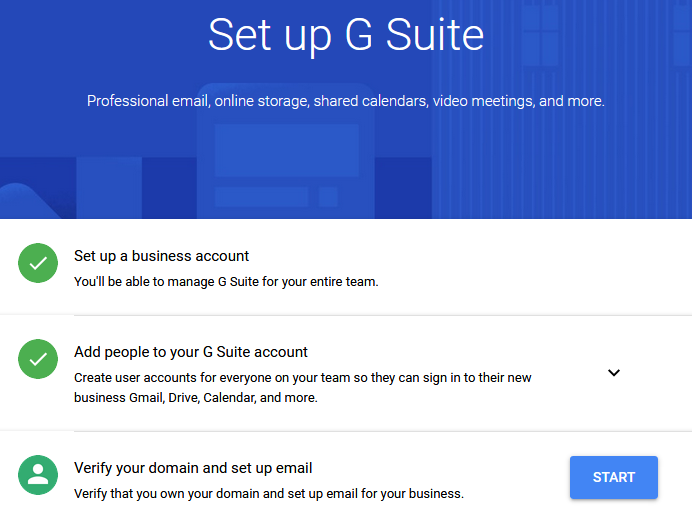
Before you begin, you need to register for Google Apps G Suite account. Don’t worry you needn’t pay anything at this point and nor will your emails be affected during the registration process. Head here and Click on Start Free Trial. Provide information about your business. If you don’t already have domain name, you need to purchase one. If you already have, your can continue by providing the domain name. It also asks you to setup an Admin Account and a user account. Remember: Your admin account is not your gmail account. Your G Suite Admin account will be any account from your organization. Basically any id that ends with @yourdomain.com can be your admin account. Add one user at least. If you are the only user, mention the same and continue.
Setup G Suite: Verifying your Domain
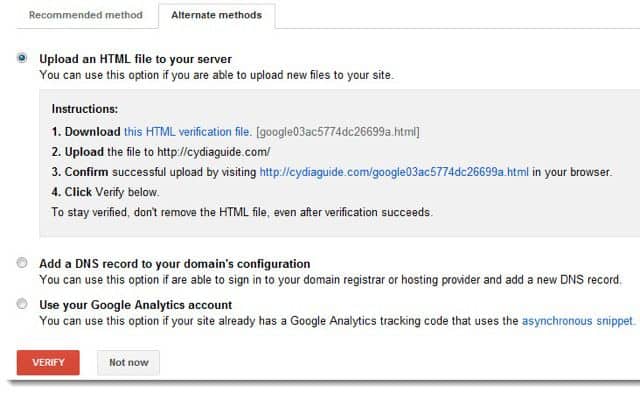
One of the first steps in setting up G Suite for your email is to verify the ownership of your domain. You cannot proceed without proving the ownership of the domain. If you are using Google Adsense, Google Analytics or any similar Google Service, you very well know the steps to verify your domain. Google provides numerous ways to verify the ownership of your domain. You can add a A record, TXT record in your DNS settings. Or if you have access to FTP of your website, you can upload a small .html file and place in the root directory. (It should be accessible by navigating to http://yourdomain.com/googlefile123.html) Once you are done with these steps, click on verify and if done correctly, Google will immediately verify the ownership of your domain and allow you to proceed.
Setup G Suite: MX Entry Settings
With this you have setup your G Suite account. Even at this point, your emails have still not moved to G Suite. Next you need to tell your server that you want all the incoming emails to be sent to Google’s server. And to do this, we need to modify Mail Exchange entries (MX entries) in the MX Records. MX entries are nothing but pointer that tell your server where to send the emails. An MX Entry record comprises of three parts:
- Priority: Usually there are more than 1 mail server in place so that if one fails, the other can support. So with priority you define which server the mail should go first to. Lower the number -> Higher Priority. 0 has the highest priority
- Destination: Destination is nothing but the address of the server where your emails will be forwarded to
- Time To Live (TTL): It is the amount of time your record will stay in cache on systems requesting your record (resolving nameservers, browsers, etc.).
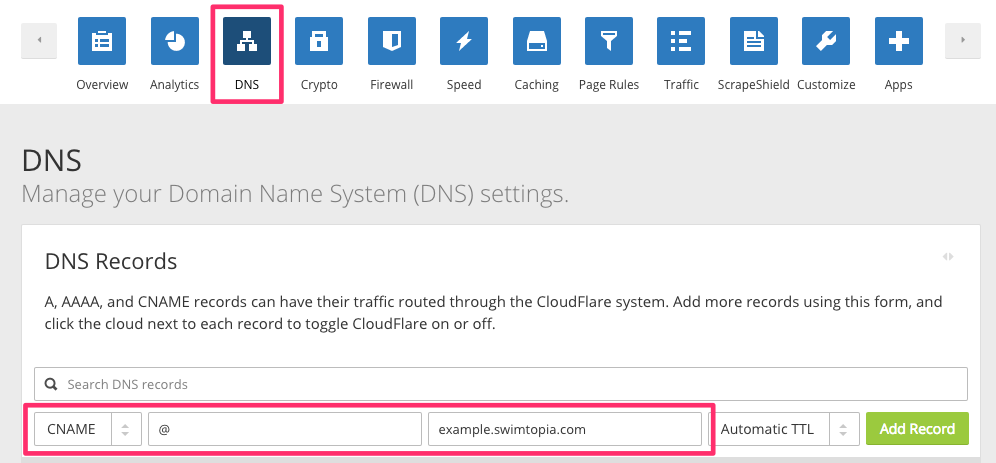
All these MX records are provided by G Suite. The next question is How do you change the MX records ? You need to go to your Domain Control Panel and change the DNS records. It will already have many records like A, CNAME, www and even MX. First delete the existing MX entry records and update with the ones provided by G Suite. Once you are done, save your settings. Now your emails will be routed to Google Servers. Note: If you are using a CDN like Cloudflare, you need to modify these settings under DNS of Cloudflare. Congratulations ! You’ve successfully setup your G Suite work email id.
Setup G Suite Billing in India – Pay via Credit, Debit Card
Once the setup is done, you can login to your email id by navigating to gmail.com and providing your complete email address. If you are in India, you would probably be on a 14 day Free Trial offer. Hence you need to setup billing before you can use. You can refer here for pricing. G Suite allows you to pay using Debit and Credit Cards only in India. And the process of verification isn’t easy at all.
Every time you try to verify your credit card, it will redirect you to the payment gateway to authorise the payment. At the same time it already deducts Rs 50 to verify your card. After you authorise the payment by providing your OTP/PIN. it comes back to the same page and you need to do the same procedure again 🙁 Almost 250Rs were charged on my card (reversed later). In the end, I had no option but to prepay the entire amount.
With this, you should have successfully setup your email with Google Apps G Suite. From now own you can harness the power to Google Server for your emails. If you want to control any aspect like access to a particular Google App or add / modify existing users, you can always login to the admin panel and change the settings. So that’s all about setting up G Suite for your email. If you find any difficulty, suggest you to comment below or tweet to me @Atulmaharaj


Excellent post on G Suite setup…
Thanks Jitendra, I hope you found this helpful.