Ever since Siteground moved to Google there was an uproar on the internet from what I observed. There were many who were against the move and felt cheated as their data would be shared with Google. While Siteground did mention that nobody can access their customer’s data, the damage was already done. To add fuel to fire, due to this move, the prices of hosting went up multifold as I spoke in this blog post. With that, it was time for me to move WordPress from Siteground and a few a new home. After scouting a lot of hosting providers and carefully going through their services offerings and customer service, I couldn’t’ decide between the various shared hosting providers.
That’s when I turned towards cloud hosting providers and checked out offerings from the giants like AWS, Azure to the developer-friendly Digital Ocean, Linode, Vultr, and the likes. After careful examination, I finally opted for Digital Ocean and moved my blog much before its expiry to see if the instances were fit for running my blog and whether I was able to manage it. Glad that Digital Ocean provides $100 credit for 60 days to try their services and it was perfect for me to explore their offerings, learn and understand how to manage a server. So this blog post is going to be on how to move WordPress from Siteground to Digital Ocean.

Prerequisites to move WordPress blog
When working with websites and servers, backups are the most important thing. As a blogger, I’ve written about how to make backup a habit. To even think of moving any website, taking a backup is important. When it comes to WordPress, there are a lot of plugins available to help you do that – All-In-One WP Migration plugin is one of them. I initially tried All In One Migration but apparently, that did mess up things due to the SSL certificate mismatch on the new server as the Nameservers weren’t changed. Hence ditched that.
Anyways, the prerequisite are has follows:
- Ensure a complete backup of your existing WordPress blog – your files, the complete WordPress folder, and your database backup (.sql file) You can follow this and this to take a backup of your content and database respectively.
- Further, we are not touching the name servers for the domain to ensure that there is no downtime while moving the blog. Changing the name servers will be (and should be) the last step when migrating websites.

Steps to Move WordPress from Siteground to Digital Ocean
With your WordPress site back up already, it’s time to set up a server on Digital Ocean before you migrate WordPress from Siteground to Digital Ocean. Compute, EC2, VM, and Droplet are just different names given by companies to their virtual private servers (VPS) offerings, Digital Ocean calls them droplets.
You can choose from a basket of droplets depending on your requirements. The most basic one costs $5 per month for a 1GB RAM 1vCPU and 25GB of storage. This configuration is enough to run multiple WordPress blogs if configured correctly. The prices of the droplets range from $5 per month to more than 100$ per month basis for the hardware configuration. $5 is a great one to start with and I feel a small to medium WordPress site can run perfectly on it with some tuning done.
So instead of me writing detailed steps on how to migrate WordPress from Siteground to DigitalOcean, I’m going to be linking to resources from Digital Ocean and other places that I referred to while setting this server.
Step 1: Create a Droplet
The first step is to create a droplet. You can sign up on Digital Ocean, Create a Project, and create a droplet based on your requirement. Digital Ocean provides a lot of different images for their droplets. They have the bare minimal Ubuntu, CentOS systems, and even one-click images including WordPress that sets up everything for you.

However, with a complete backup, before I decided to Move WordPress from Siteground to Digital Ocean, I chose a vanilla Linux machine and installed the LAMP stack on it (Linux, Apache, MySQL, and PHP). This link will help you do set up a LAMP stack on a Linux droplet. I followed this tutorial and was able to set up a LAMP stack. At this point, when you visit your droplet with the IP address provided, you will see a Hello World page.
Step 2: Import Database
LAMP stack is in place and this is the bare minimum things required for WordPress to run. We now need to upload the database backup and file backup that we have taken earlier. We’ll start by uploading the database file first. In order to do this, you can either use the SSH console or use PHPMyAdmin (you might be familiar with this on shared hosting) However, we have not yet installed PHPMyAdmin. So go ahead and install PHPMyAdmin

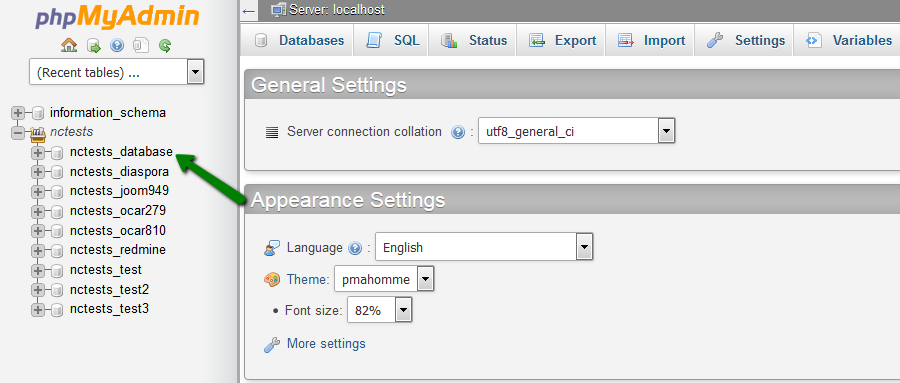
Once installed, login to PHPMyAdmin and hit on import, and upload the database file. If done correctly, you should see your WordPress database with all the tables there. Reference.
Step 3: Upload WordPress files
With the database in place, it’s time to upload the content files and folders. Now, you need to connect to your server via FTP (I use FileZilla) and move all the files to the server. Extract all the files inside the www/yourdomain/ folder. Now if you navigate to the IP address provided, you should probably see some error since and this is due to the fact that your WordPress database credentials have changed.

You have to manually modify your wp-config file and update the database username and password (Reference) If all is done correctly, refresh the page, and should see your blog. Congratulations, you have successfully completed the content migration for your WordPress blog. However this is not over yet, there’s a lot more to do when you Migrate WordPress from Siteground to Digital Ocean.
Changing Nameserver for your domain
If you think, this is working fine and as expected, you can now go ahead and change the name server details only if you are sure. Because once you do this, all your visitors will be served from your new Digital Ocean droplet. To do this, you need to go to your domain control panel settings and head to DNS settings. This is a mandatory step to migrate WordPress from Siteground to Digital Ocean completely.

You should see some ‘A’ records pointing to an IP Address. I’d suggest exporting the DNS entries to be on the safer side. Change this IP address to the new IP address of the Digital Ocean droplet and save. Once this change is done, you should wait for a couple of hours for the changes to take effect. How do you know if the DNS settings have been updated?
One of the simplest tools, I use is the ‘tracert‘ tool in Windows. Just type tracert yourdomain in a new command prompt window and wait for the trace to complete. You should see the IP address of your Digital Ocean droplet at the end. Congratulations, now have successfully migrated WordPress from Siteground to Digital Ocean.
You might also have to configure SSL settings on the droplet as you may receive such errors. For that, you can follow this guide to use the FREE SSL provided by Let’s Encrypt. This can get tricky especially if you are using Cloudflare DNS.
Now that you’ve moved your site from Siteground to DigitalOcean, here’s a guide I’ve written to improve the performance of your VPS for beginners.
Final Thoughts
I’ve tried to be as detailed as possible in this blog post to help you understand how to migrate WordPress from Siteground to Digital Ocean. These are best to my knowledge and I was able to successfully migrate my blog to Digital Ocean. My prior hosting was expiring in September, However, I started exploring Digital Ocean from August first week so that I could get time to understand how things work.
And many of you might not have even realized that I kept switching between the service providers during the initial days of moving WordPress from Siteground to Digital Ocean until I got the configuration right.
Steep Learning Curve – Not for everyone
One disclaimer that I’d tell you is that the learning curve is extremely steep when you are moving from shared hosting to Digital Ocean. Especially for non-technical people, it can be a hair-pulling experience. Me being a technical person took some time to figure things out however I feel I’m comfortable now.
3rd party services to manage
To avoid this, you can opt for services like ServerPilot, CloudWays, or RunCloud. However, do note that these services charge extra over and above the price for a Digital Ocean droplet or Linode or Vultr, etc. For instance, a $5 droplet on Digital Ocean costs $10 per month on Cloudways with all dedicated support and services. They’ll do everything for you. If you are fine with the price, go ahead and choose any of the services.
I can help you migrate 🙂
However, if you are not but still want to use Digital Ocean droplet, DM me on Twitter @Atulmaharaj or contact me. I will do the complete setup for you for a small fee 🙂 Rest assured you shall see significant improvement in the load speeds and other aspects of your blog after you migrate WordPress from Siteground to Digital Ocean.
In the next blog post, I’ll talk about some other tools that you must have on your Digital Ocean droplet that will help you to control your droplet and run your website smoothly. Stay tuned.
So did your find this blog post on how to Migrate WordPress from Siteground to Digital Ocean helpful? Share your thoughts in the comments below or tweet to me at @Atulmaharaj or DM me on Instagram.
 SocialMaharaj Technology, Travel, Food et al


I’m thinking about moving from Siteground to DigitalOcean and a bit worry about all the complicated steps you mentioned.
BTW, thanks a lot for sharing this post!
For a first-timer and a non-technical person, things can get complicated. However, if you still plan go ahead, I’m happy to help 🙂 DM me on Twitter for any assistance 🙂
Did you consider running Plesk to do the WordPress install? Plesk Obsidian is available via the DO marketplace.
Hey Josh, cPanel and Plesk would have been heavy for a 1GB RAM instance along with WordPress & LAMP stack. Also, as per my understanding, both Plesk and cPanel require a license. Please correct me if I’m wrong.