One piece of advice that I give all the content creators is to have a habit of backup. There’s nothing more devastating than lost content. It can be photos, videos, or even blog posts. In fact in some of my earlier posts as well I’ve spoken about the importance of backups. Backup becomes more critical if you are a blogger with a self-hosted blog or a website admin. If you lose even a byte of data you stand close to losing everything.
It’s advisable to set up automatic backups, but those who are tech-averse choose to pay for backups. While others like me, find ways to automate server backup. And in this post, I’m going to share a complete tutorial on how to automate server backup on Raspberry Pi.
The idea for this server backup on Raspberry Pi is to have the backup created on the server copied to the Raspberry Pi automatically and stored on a local hard disk as well.
Why Raspberry Pi?
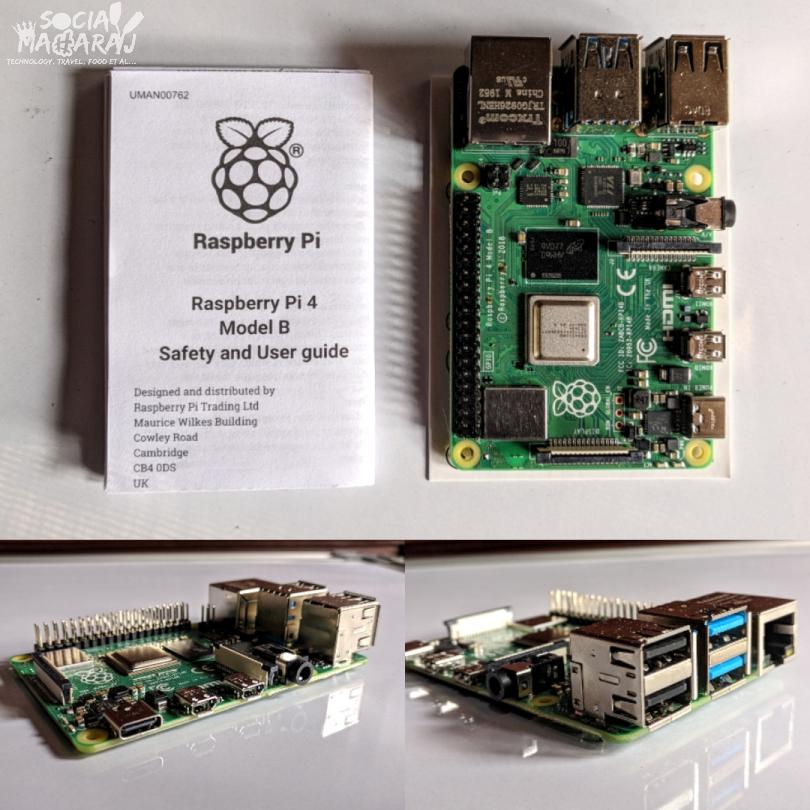
If you have been following my blog, you know that I’ve purchased a Raspberry Pi 4 recently. While I have a lot of projects in the pipeline, one project that I recently worked on is how to automate server backups on Raspberry Pi. Many of you might question, why is that needed? Most of the cloud service or web hosting providers provide backup services. Well, most of them aren’t free (at least on the starter plans) and the ones that are, are expensive (for me).

Further, most services help you automate server backups but most likely the backup stays on your server. What’s the use of a backup in that case? So you either download them via your control panel or FTP. Some advanced users have code in place to push their backups from their server to online storage services like Google Drive, AWS S3, etc. One such service I came across was BackupSheep after I moved my WordPress from Siteground to DigitalOcean. While the free plan was sufficient, I wanted more and hence a project that I worked on was to automate server backup on Raspberry Pi.
Also the fact that Raspberry Pi has a very low power consumption when comparted to a traditional computer. Even keeping this on 24×7
Challenges Faced
A typical web/app server that runs on a Linux machine, can enable complete server backup using the cron provider. Using cron, one can schedule a backup to occur at specified times. It usually takes a backup of a specific folder, zips it, and places it in a folder. Next, you access the server and download this zip file and save it.
Even before I started working on this, I was clear of some of the challenges that I might face while trying to automate server backup on Raspberry Pi. All of them are mentioned below:
- Accessing Raspberry Pi Remotely: One way to achieve this functionality was to enable SSH access on my Raspberry Pi and allow my remote server access to Raspberry Pi. The main challenge here was that my public IP was behind a NAT. (Most of the ISPs hide the actual IP addresses behind a NAT and all incoming ports are blocked) So you can either request for a static public IP or take the other route. (mentioned later on in this post)
- SSH access to the remote server: SSH is an industry-standard of connecting securely to remote systems. And even in my case, SSH was the only option. While setting it up was easy, one challenge was that if there was a paraphrase provided along with the SSH key, how could the script automatically enter the paraphrase when it executes?
Workaround = Desi Jugaad
For the two problems mentioned above, I chose the following two work arounds.
- Access remote server from Raspberry Pi: So what if the remote server is not able to connect to my Raspberry Pi and ‘push‘ the backup. I can still access the remote server from the Raspberry Pi. Since I know that time when the server backup runs along with the duration, I can do an SSH from my Raspberry Pi to the server after that backup is complete. This was a lot easier and simpler method.
- SSH Key without paraphrase: I couldn’t figure out a way as how can the script enter the paraphrase automatically. Hence I chose the easier way to connect to the remote server and that was using an SSH key without a paraphrase. That made the whole process easier.

The Final Solution: Automate Server Backup on Raspberry Pi
With the workarounds in place, all that is needed to automate server backup to Raspberry Pi is a few lines of code. The approach we take here is:
- Create a bash script to connect to the remote server & copy the file from there to local storage on Raspberry Pi
- Setup a cron job to run this script
Code to automate server backup
You will be surprised that it’s just a one-line code that is needed to connect to your remote server and automate server backup on Raspberry Pi. We are going to use the SCP or secure copy command to get this job done. But before this, ensure that you have enabled SSH access for your Raspberry Pi to access the remote server. Only then will this script work. You can refer to this article to add a SSH host to the remote server.
# Parameters
#scp - secure copy command
#-r - flag to tell the script to copy everything in the directory (recursively)
#user - username of the remote server
#SERVER_IP_ADDRESS - IP address of the server
#Path 1 - Path to the file on remote server
#Path 2 - Path to copy the file to on Raspberry Pi

#Sample Code Below
#scp -r user@<SERVER_IP_ADDRESS>:<Path 1> <Path 2>
scp -r [email protected]:/var/backup/ /home/pi/Downloads/
If you open the terminal and just run the above code after replacing it with actual values, you should see the Raspberry Pi starting the download process if everything is correct. All you need to do now is to copy this into a file and save it as a shell script.
Create a Cron Job
This is the easiest task of the complete how to automate server backup on Raspberry Pi. All you need to do now is to create a cron job that will run this script at specified time intervals. For that you need to do the following:
Open crontab by typing crontab -e and navigate to the end of the document
Type the frequency of script execution in the following manner
15 1 * * * /home/pi/Documents/ServerBackupScript.shThe above line means that the script with run 01:15 every day. You can configure this according to your needs. I recommend using crontab.guru to get the right settings for the cron job. Once the cron job is set up, sit back and relax.
Every day at 01:15, our Raspberry Pi will access the remote server via SSH. It will then find the backup files at the path specified. (These files were generated by the backup script running on the server) Once found, it will copy everything in the path specified and end.
Conclusion
While I had automated server backups on my server, I still had to copy them to my local system every week. Though there’s no harm in doing that, why waste time if that can be automated? With that mantra in mind, I thought to automate server backup on Raspberry Pi with this project. The script seems to be working just fine. I’d recommend hooking up your Raspberry Pi to Ethernet over WiFi since the speeds are much better on a wired connection and the speeds would be faster in getting the server backup on Raspberry Pi.
So that was my complete tutorial to automate server backup on Raspberry Pi. I know for normal folks this post would’ve been greek & Latin but for geeks, I hope this was useful. Let me know your thoughts in the comments below or tweet to me at @Atulmaharaj, DM on Instagram or Get In Touch.
 SocialMaharaj Technology, Travel, Food et al


Wow what an amazing post.. Never read anything with so much detailing. I completely agree loosing your content is really scary and devastating. Will share this with my friends too… Raspberry pi..is an awesome products and automate server backup is need of an hour. Thanks for sharing Atul.
Thanks a lot Swatiji, eversince I got my Raspberry Pi, I’m in love with it!