By the time you are reading this post, you would already have a good idea about Google Webmaster. I first talked about What is Google Webmaster for bloggers and how it is helpful. If you haven’t read the first post, do check it out here. In the second post I talked about how to set up your blog for Google Webmaster. From choosing the property to setting up the DNS details as required. If you haven’t gone through it, I strongly recommend you to go through it here before proceeding. In this post Google Webmaster Tutorial for Bloggers – Part 3, I’ll talk about the most important aspect – Sitemap. This is the most important step for setting up Google Webmaster for Bloggers.
Google Webmaster for bloggers: What is a Sitemap ?
I’m sure many of you would have already guesses as to what a Sitemap is. A map of all the links, pages, posts on a website. Yes, it’s as simple as that. The sitemap file is a very useful file. It is an XML markup file – markup language widely used now a days. You as a human might not totally understand the sitemap file, but search engines understand this at ease. Sitemap file is important because it is a way the search engines understand what all is present on your blog. Think of it as a table of contents for your blog. It includes everything that is on your blog – links, posts, pages etc. When search engines reach this page, it knows what all is their on the blog. Based on that they ‘crawl‘ your blog and accordingly store it, and show it users on the search engine results page. I hope now you know what a sitemap is and how it is vital.
How do you generate a Sitemap ?
Generating a sitemap.xml file is the most simplest task of all. In fact you might not have to even generate it. Most of the imminent blogging platforms – Google Blogger and WordPress – create a sitemap file by default. And this sitemap will by default consist of all the links and pages on your blog. A sitemap can usually be found at http://mydomain.com/sitemap.xml. However, if you are using some tools to generate the XML file, the path can be different. Especially for WordPress Self hosted blog, you can install plugins like All in One SEO, Yoast SEO or even Jetpack. These plugins will give you freedom to create different sitemaps for posts and pages along with allowing you to take full control of your sitemap.xml file. With these tools you decide what should the part of this file.
Submitting Sitemap to Google Webmaster
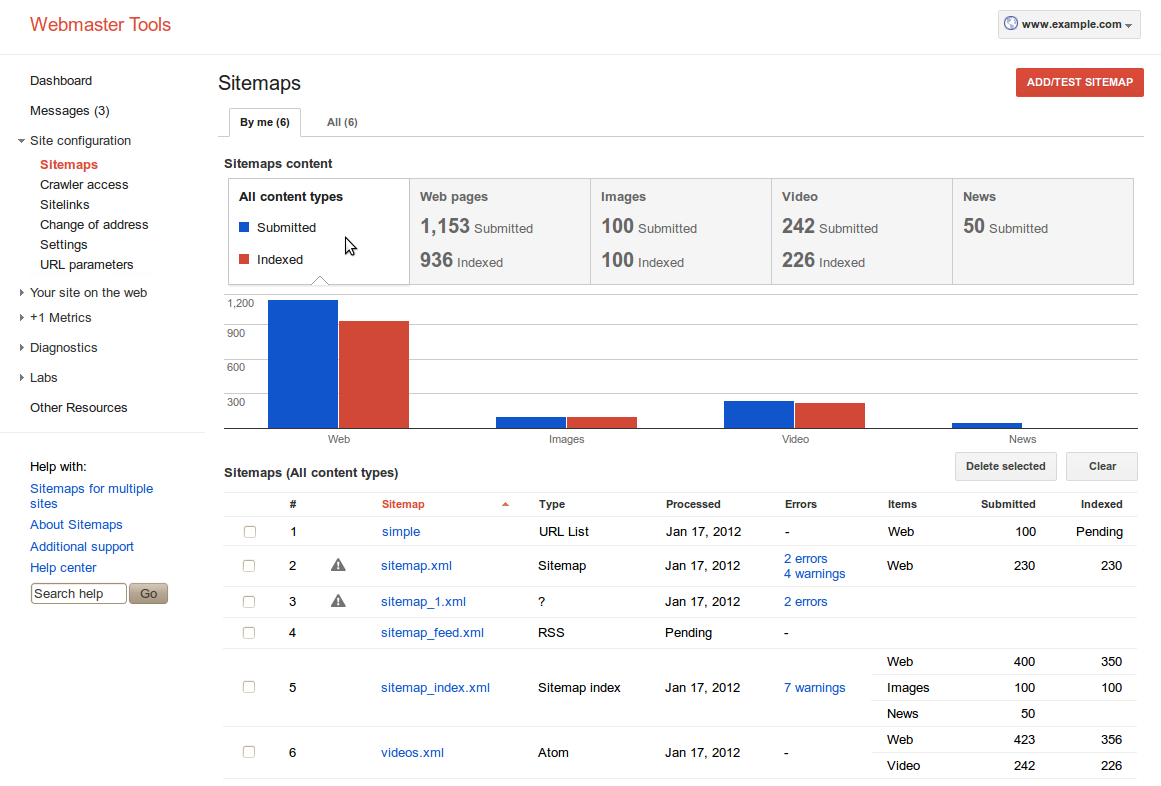
Google Webmaster for bloggers is a wonderful tool. Once you have your sitemap.xml file in place, you simply need to tell Google about it. After you have added your blog, select that from the drop down on top left. Below that you should see a sitemap option. Upon clicking it you are taken to a new page that lists all the sitemaps you have submitted. For the first time there won’t be anything there. In the text field above, mention the path to your sitemap.xml on your blog. And hit submit. Once submitted, Google takes some time to crawl the pages,posts you have provided as a part of the sitemap file. It will again take about 24-48 hours for the results to appear here.
When you submit your sitemap.xml file to Google Webmaster, you are essentially telling Google that “Boss, these are the pages, posts I have on my blog, please have a look at them” Once Google’s crawlers crawl this file, they would know where to go next and what all is there on the blog. Thus it is very important to submit a sitemap to Google Webmaster. Now that you have submitted the sitemap, wait for Google to crawl your blog and throw up results. So you see that Google Webmaster for bloggers is quite a handy tool that helps with technical SEO for bloggers.
In the next post I’ll talk about how to track the performance of your blog with Google Webmaster for bloggers. Stick around for some more Google Webmaster for Bloggers Gyan – Part 4: Tracking Performance If there’s anything you didn’t understand or want more information, do mention in the comments below or tweet to me at @Atulmaharaj
 SocialMaharaj Technology, Travel, Food et al


