In this post Google Webmaster Tutorial for Bloggers – Part 4, I’ll talk about how to track performance on Google Webmaster for your blog. Whatever you have done till now is just the initial setup. Having done everything as per the last post, you would have already submitted the sitemap to Google Webmaster and now it’s time to track performance on Google webmaster. And by now you should have seen it throw up some numbers to you. Not seeing any numbers yet ? Well not an issue it takes about 24-48 hrs for Google to actually scan your blog and throw up the statistics. So what exactly do these numbers mean ? How do you track your blog’s performance on Google Webmaster tools ? Continue reading this post on Google Webmaster Tutorial for Bloggers – Part 4 Tracking performance of your blog using Google Webmaster Tools.
Track performance on Google Webmaster Tools
Overview
The first thing that you will notice after logging in to Google Webmaster console is the overview section. This is like the home view which lists down the highlights of everything. The overview tab will show you the performance and coverage graphs for your blog. Read below to know more about each section.
Performance
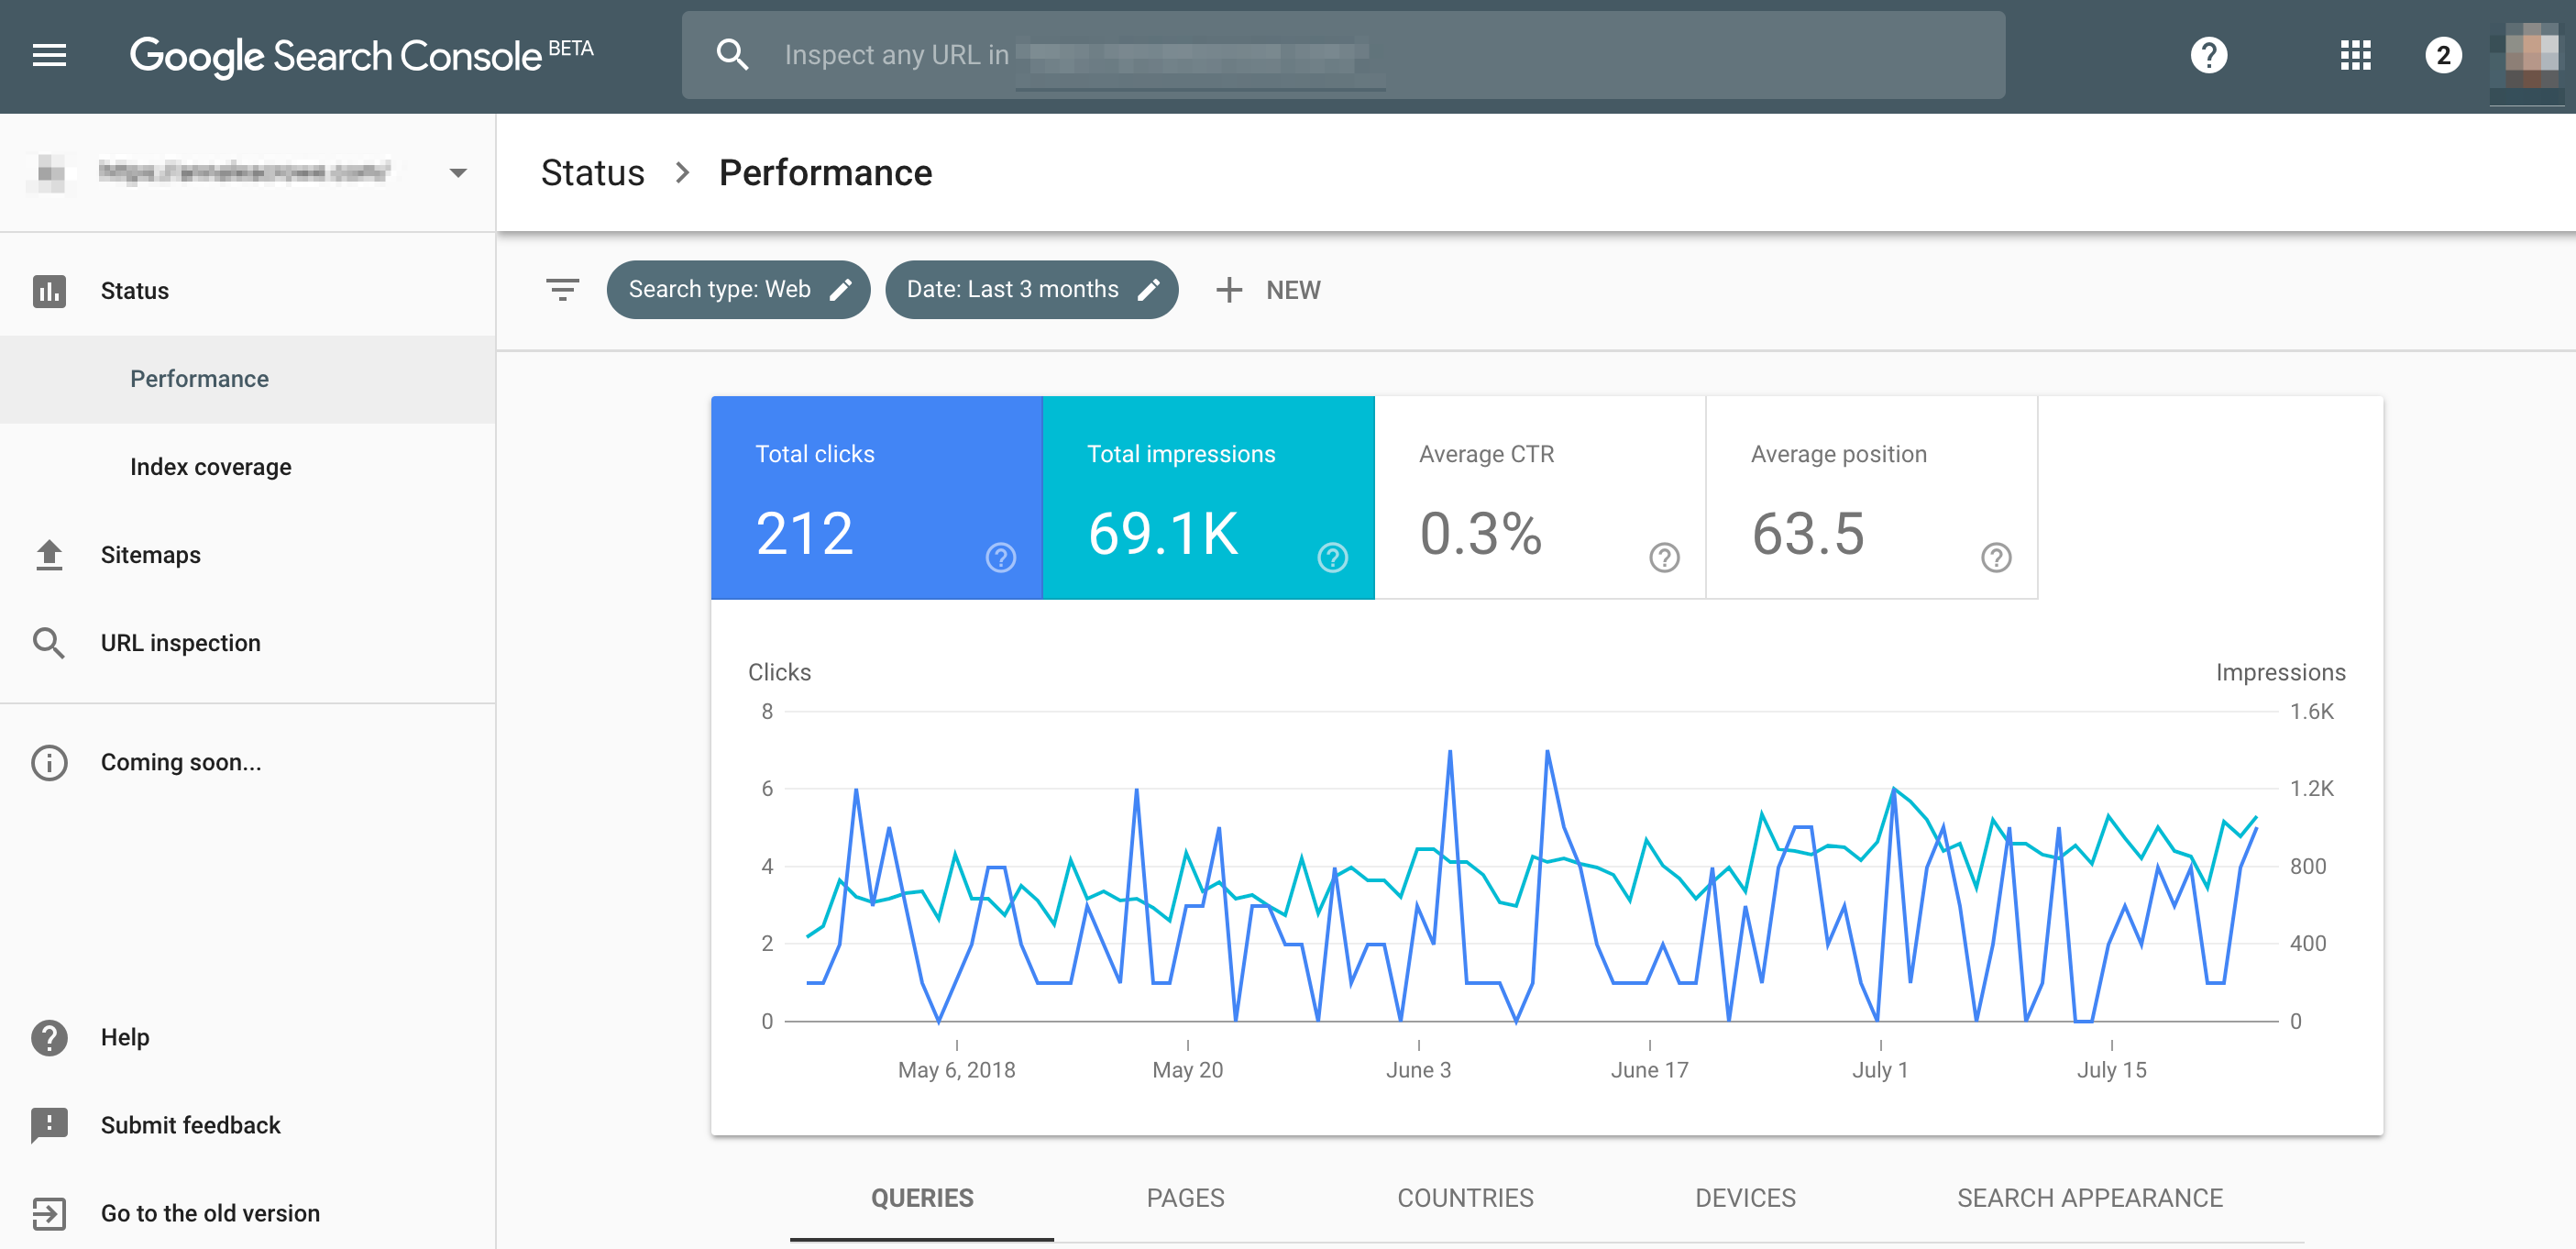
This is the important section in Google Webmaster console. It includes all the metrics that shows how your blog has performed on the Google search engine results page – SERP. The first graph shows a graph depicting the Total Clicks, Total Impressions, Average CTR and Average Position. So at any given junction in the graph, you will the clicks and impressions that happened for your blog on a particular day. Below is the explanation for the metrics.
- Total Clicks: This is how many times a user clicked on your blog link on the search page to reach your blog.
- Total Impressions: This is the number of times your blog is ‘seen’ by a user in the search engine results page. Note that this metric is calculated differently for web and image search.
- Average CTR: Average Click Through Rate is the percentage of impression that converted to clicks.
- Average Position: This depicts the average position of your blog in the Google search engine result page.
Search Result Analysis
The next section shows the list of queries for which your blog shows on the SERP. The list is sorted in descending order of the number of clicks reaching your blog. Under the pages tab, it shows the most popular link on SERP again sorted in descending order of the number of clicks and impressions. The next tabs show a similar list based on the device, country and search appearance.
Troubleshoot Google Webmaster Errors
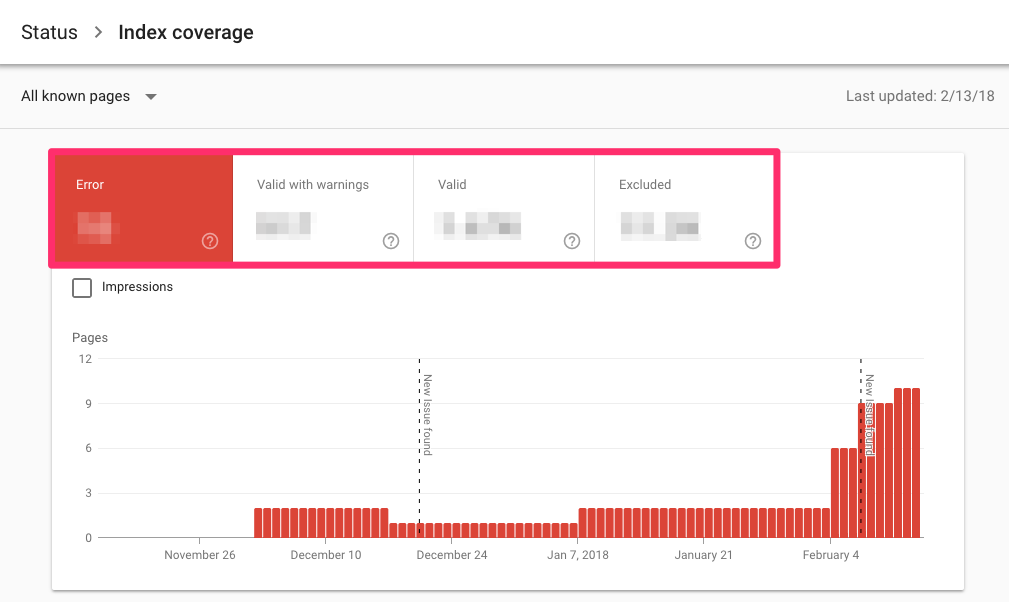
The Coverage section of Google Webmaster tools helps you analyse the issues related to your blog. It shows a graph based on the number of pages/links the crawler has crawled based on the sitemap you submitted. The tabs show the Error, Valid with warnings, Valid and Excluded. Let’s see each of it in detail below.
- Error: This shows the number of pages that aren’t being indexed by the crawler due to some reason and the reason is mentioned for each link on the same page. Note that these pages don’t appear on Google SERP.
- Valid with Warnings: This shows the number of pages that have warnings but have been indexed. These pages appear in the Google SERP.
- Valid: This is the number of pages that have been indexed and are visible on Google SERP. Yaay !
- Excluded: These are pages that have been excluded from the SERP. You might want to dig to find the reason for this too.
End of Google Webmaster Tools for Bloggers Series
With this, we come to an end of the Google Webmaster tool for bloggers series. In the series we learnt about what Google Webmaster is and how it helps bloggers. We also learnt the registration and sign in process along with how to verify the ownership of your domain and verify the blog on Google Webmaster. Later on we saw how to generate and submit sitemap to allow Google to effectively track your blog posts. And in the last section, we learnt how to track the performance of your blog on Google SERP. I hope you found the series helpful. If you have any question related to anything, do mention in the comments below or tweet to me at @Atulmaharaj
 SocialMaharaj Technology, Travel, Food et al


